As I was going through my youtube feed and seeing what was New, I came across this Idea
DIY Galaxy Backpack You take a black backpack and paint Galaxies all over it.
I thought, wow, now that’s a neat idea. So I decided to comment on the video and tell my daughter,
“We’re going to make a one of a kind backpack for you going back to school”. She agreed to do it.
Of course when I do a dupe of something I have to put my own spin on it!
So I added Glitter and Bling. This isn’t a full tutorial, but rather a DIY Instructional Post. Enjoy!!!
Supplies:
A Plain Black Backpack (as shown above, but painted), I got mine at Walmart for $8.88.
2 Towels and 1 Washcloth for stuffing the Backpack makes for an easy surface to paint onto..
 You’ll also need Tulips Soft Velveteen fabric paint, In Colors White, Grape, Blue, and Azalea (Pink).
I purchased these in the t-shirt painting section at Michaels for about $1.50 each (not bad).
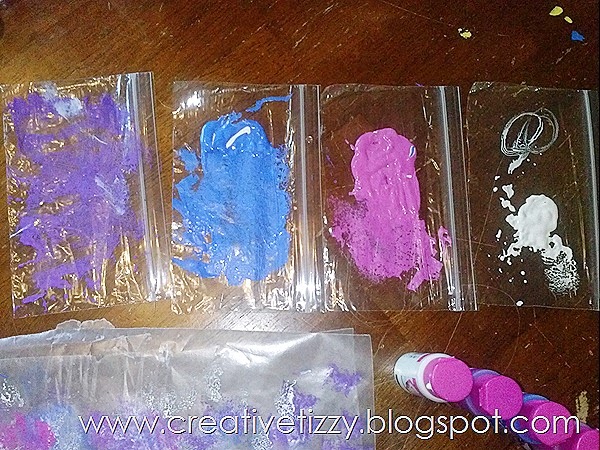 I used Plastic snack bags for the paint to sponge onto the backpack.
 I used a big sheet of wax paper to dab off excess paint.
I then used one yellow kitchen sponge $.92 at Walmart, that I cut into two halves.
Cut the edges off to make it easier to work with and used each corner for a different color.
I also used 2 fine detailed paint brushes, which I purchased a while ago at Michaels in a
set for about $8.00 ?? They are to nice to work with, very Ergonomic for the hands..
 I had some glitter on hand and have been wanting to use my daughters Aqua,
Crystazzi Flatback Crystals also purchased at Michaels, which I have used clear flatbacks before
in my tutorial Bling out your last years sandals.
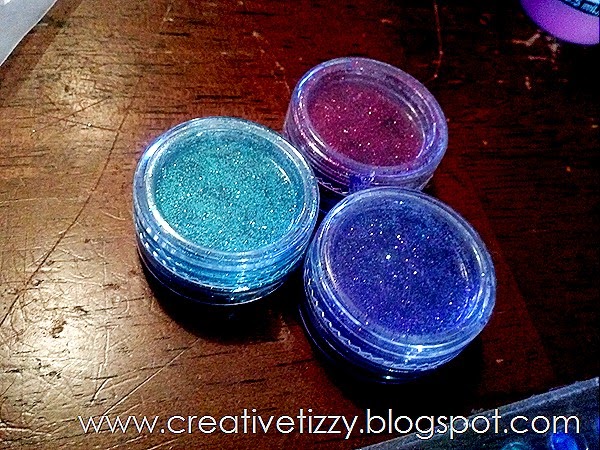 A close up of the pretty glitter Aqua, Magenta, and Purple
 We also used bigger generic Crystal gems that were about $1.00 at Michaels.
 Directions: So we proceeded to load up the sponges with one color at a time.
Then we would dab as much off as we could onto the piece of wax paper, when applying,
you almost want the paint to be rubbed on dry and not splotchy or clumpy
to give each galaxy softness and depth. We used a mixture of Grape and white mixed together first,
then Blue and white, then Azalea Pink and white. We made little clusters just dabbing on a little at a time,
we’d turn the sponge and onto the next color and so on!
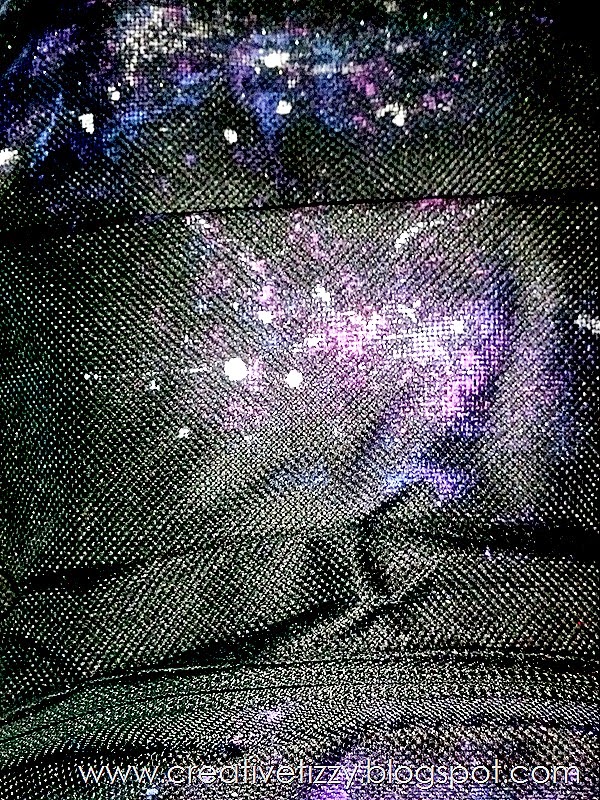 Here’s a close up shot of the Galaxy Clusters, yours will look different than mine but you get the idea.
 Stand back every so often and take a look at how its coming along.
You may need to add more of a color as you go.
 Also make sure that you randomly dab on the paint twisting your hand as you go,
so that you don’t get the same pattern on each galaxy.
 We used the paintbrush ends to dab on stars in a circular pattern to simulate a galaxy of stars.
Again, very random or you could paint on a constellation like the Big Dipper,
which my daughter did at the very bottom right. Do you see it ;)
 We also dry brushed on some shooting stars and simulated gaseous explosions,
as seen in space telescopes. We dabbed our finger into some glitter
and before the paint was completely dry, spread it across each galaxy for twinkle.
 Then we added the Crystazzi flatbacks with Nail Glue (my go to glue for applying gems).
 Here is what the final product looks like in Daylight.
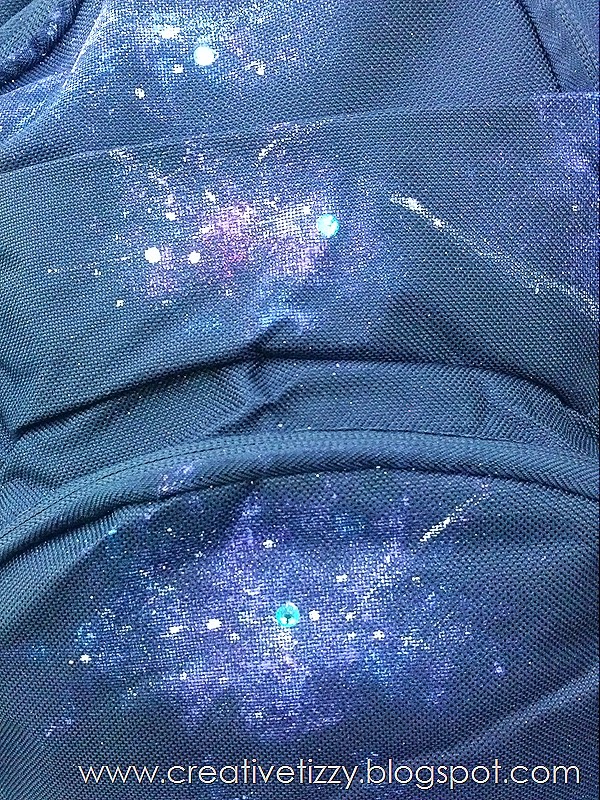 I have to admit, My daughter and I were quite impressed with the job we did and
one of the best parts was it was sooo easy. Plus we had a nice Mother/Daughter bonding time.
Just let go and have fun! And that’s just what we did!!
 Here is a close up of one of the generic crystals from Michaels @ $1.00, you can’t beat that.
 And another Pretty Blue one, a Planet or a Blue Sun, who knows it’s Outer Space!!

 Now we chose to go a little heavier with paint on the arm straps, because the material is heavier in nature.
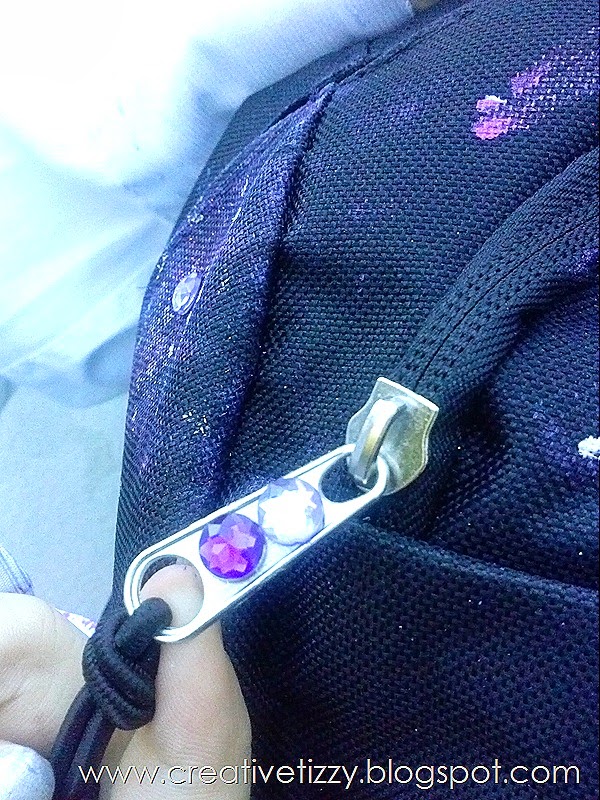
 Then we glued the bigger Gems onto the Zipper Pulls, those babies aren’t coming off, I tell ya!!
So let me know if you try this project out and send me a link to your blog post or pics.
I can’t wait till my daughter goes to school to hear what comments she’ll get on her New Backpack!!
This project is rated EZ on the DIY scale and is suitable for ages 5 and above with supervision.
What back to school projects have you been working on
and if you like this project leave me some comment Love!!
Don’t forget to follow me on Twitter, Pinterest, and Google+
Check out my sidebar for all social media…
XOXO,
Christina
Quote of the Day:
Work keeps us from three great evils, boredom, vice and need.
--François Marie Arouet Voltaire
Technorati Tags:
Back to School,
Backpack,
Galaxy,
Bling,
Craft,
Creative,
DIY,
Fun,
Inspiration,
kids,
michaels,
Paint,
Pink,
Purples,
saving money,
style,
tips