Showing posts with label kids. Show all posts

Back to School DIY Bling Galaxy Backpack

CAM00315

As I was going through my youtube feed and seeing what was New, I came across this Idea

DIY Galaxy Backpack You take a black backpack and paint Galaxies all over it.

I thought, wow, now that’s a neat idea. So I decided to comment on the video and tell my daughter,

“We’re going to make a one of a kind backpack for you going back to school”. She agreed to do it.

Of course when I do a dupe of something I have to put my own spin on it!

So I added Glitter and Bling. This isn’t a full tutorial, but rather a DIY Instructional Post. Enjoy!!!


Supplies: 

A Plain Black Backpack (as shown above, but painted), I got mine at Walmart for $8.88.

2 Towels and 1 Washcloth for stuffing the Backpack makes for an easy surface to paint onto..


CAM00284You’ll also need Tulips Soft Velveteen fabric paint, In Colors White, Grape, Blue, and Azalea (Pink).

I purchased these in the t-shirt painting section at Michaels for about $1.50 each (not bad).


CAM00285I used Plastic snack bags for the paint to sponge onto the backpack.


CAM00287   I used a big sheet of wax paper to dab off excess paint.

I then used one yellow kitchen sponge $.92 at Walmart, that I cut into two halves.

Cut the edges off to make it easier to work with and used each corner for a different color.

I also used 2 fine detailed paint brushes, which I purchased a while ago at Michaels in a

set for about $8.00 ?? They are to nice to work with, very Ergonomic for the hands..


CAM00291    I had some glitter on hand and have been wanting to use my daughters Aqua,

Crystazzi Flatback Crystals also purchased at Michaels, which I have used clear flatbacks before

in my tutorial Bling out your last years sandals.

 CAM00294 A close up of the pretty glitter Aqua, Magenta, and Purple


CAM00323We also used bigger generic Crystal gems that were about $1.00 at Michaels.


CAM00288Directions: So we proceeded to load up the sponges with one color at a time.

Then we would dab as much off as we could onto the piece of wax paper, when applying,

you almost want the paint to be rubbed on dry and not splotchy or clumpy

to give each galaxy softness and depth. We used a mixture of Grape and white mixed together first,

then Blue and white, then Azalea Pink and white. We made little clusters just dabbing on a little at a time,

we’d turn the sponge and onto the next color and so on!


CAM00302  Here’s a close up shot of the Galaxy Clusters, yours will look different than mine but you get the idea.


CAM00304Stand back every so often and take a look at how its coming along.

You may need to add more of a color as you go.


CAM00305Also make sure that you randomly dab on the paint twisting your hand as you go,

so that you don’t get the same pattern on each galaxy.


CAM00327We used the paintbrush ends to dab on stars in a circular pattern to simulate a galaxy of stars.

Again, very random or you could paint on a constellation like the Big Dipper,

which my daughter did at the very bottom right. Do you see it  ;)


CAM00331      We also dry brushed on some shooting stars and simulated gaseous explosions,

as seen in space telescopes. We dabbed our finger into some glitter

and before the paint was completely dry, spread it across each galaxy for twinkle.


CAM00297Then we added the Crystazzi flatbacks with Nail Glue (my go to glue for applying gems).


 CAM00314Here is what the final product looks like in Daylight.

CAM00313I have to admit, My daughter and I were quite impressed with the job we did and

one of the best parts was it was sooo easy. Plus we had a nice Mother/Daughter bonding time.

Just let go and have fun! And that’s just what we did!!


CAM00316 Here is a close up of one of the generic crystals from Michaels @ $1.00, you can’t beat that.


CAM00317And another Pretty Blue one, a Planet or a Blue Sun, who knows it’s Outer Space!!


CAM00320CAM00322 Now we chose to go a little heavier with paint on the arm straps, because the material is heavier in nature.


CAM00318CAM00319Then we glued the bigger Gems onto the Zipper Pulls, those babies aren’t coming off, I tell ya!!

So let me know if you try this project out and send me a link to your blog post or pics.

I can’t wait till my daughter goes to school to hear what comments she’ll get on her New Backpack!!

This project is rated EZ on the DIY scale and is suitable for ages 5 and above with supervision.


What back to school projects have you been working on

and if you like this project leave me some comment Love!!

Don’t forget to follow me on Twitter, Pinterest, and Google+

Check out my sidebar for all social media…

XOXO,

Christina


Quote of the Day:
Work keeps us from three great evils, boredom, vice and need.
--François Marie Arouet Voltaire


Have Fun, Stress Less when Vacationing with the Kids ~Post 1: Streamlining the preparation with 15 easy tips

1345958476558 Vacation to Myrtle Beach, South Carolina -August 2012

With a little bit of planning you can have a “FUN” vacation, but you need some tips to prepare yourself ahead of time when traveling/vacationing with kids. The following are steps you can take to use as a guideline. I’m telling you I am the master at traveling light and effortless, since we had to travel back and forth from Indiana to Pennsylvania every year. The following may be a little out of order but extremely helpful.

  1. Think out your whole trip ahead of time. Sort of a budget before the month begins. So you know mostly what to expect and life isn’t too out of sorts for you and your kids. Preparation is key.
  2. Determine your length of stay, a couple of days, a week, 2 weeks or more, then you can plan around this time accordingly.
  3. If you are driving, will you drive all the way through or break the trip up. I break the trip up by staying over night in a hotel if the drive is longer than 7 hours. Since I have four kids ages 16, 12, 9, and 7, you can see why. I do want to get to my destination, but with my sanity intact!!
  4. What amenities does the Hotel/Villa/Condo have for convenience once you’re there. Don’t be surprised at what they have and don’t. Get acquainted with their policies online for pets, gym, pool, laundry, and access to the outside, the internet and ATM, oh and do they provide a free breakfast?
  5. With hotels, are you going all-inclusive or are there any hidden fees. Also, sign up for their club card if applicable to maybe earn nights or get coupons and discounted stays. My husband is a “Priority Club” member of HolidayInn so that helps earn free nights for us if we choose to go with HolidayInn.
  6. Check various websites, like hotels.com or priceline, orbitz, expedia, travelocity to find and compare hotel deals. I did this and then went to my hotel website to see if they had anything to offer. They actually had the lowest pricing. So I booked on the hotel site. You can also check for coupon codes for a better deal.
  7. Pack lightly, Don’t pack “Just In Case” style. So that you don’t have too much to bring with you.
  8. Check the weather for traveling to and from your destination. So that you are prepared for what is to come for the most part.
  9. Make sure trunk is packed efficiently. Where you can see through the back window safely, or if your lucky to have a case for on the roof of your car, this will not apply.
  10. If staying longer than a week, will you need to do laundry? If so, do they have a service that they will bill to your room. Or laundry facilities that you can use. Remember to get a roll of quarters if that’s the case.
  11. Can you get away with packing kids clothes in a backpack, they can carry it on their back and help take things to the hotel room. This is how I would always pack my little ones things, but now their clothes are getting bigger so I have to stuff into a small wheeled suitcase. I would sometimes double up 2 in 1 suitcase.
  12. Bring Ziploc bags in various sizes: Gallon, Quart, Sandwich.
  13. Separate Kids and Adults phone/laptop/iPod/tablet etc chargers, into baggies. Then the ones you need when traveling in car can be easily reached for if mom keeps them in purse or where kids will be seated.
  14. Moms, always keep camera and Smartphone in purse for those times when you need to take a quick picture or make a phone call.
  15. Make a list of the things you will need for the trip. That being said, will you need snacks, drinks, medication, special needs, batteries, tickets? Write it down so you don’t forget when your at the store.

I hope that you’ve enjoyed this post so far, but you’ll have to come back tomorrow… to be continued. So stay tuned for Part 2. Hope you have a great start to your weekend. See you tomorrow!! ~Christina


Organizing Photos

This process is a little lengthy. What I have found is to just dive in and get started to keep the momentum going. I figured out an easy system anyone can do, low cost, and gets the photos out of the developing envelopes and shoeboxes that are typical storage for your photos. You get to show them off finally!! Here's the final product:
I started off by separating photos and memorabilia by child, me, hubby, family and pets. This was done over medium sized baskets and bins, for sorting out. Seen here:
** I am avid scrapbooker, but now do it digitally when I have the time. The problem I found with scrapbooking is that it made the process of getting photos into albums, take forever and I finally gave up. I tend to be a perfectionist, because afterall these are my photos and a 2 page layout would take me sometimes 3 hours with all of the cutting, pasting and such. Way to long. I really wanted my kids to see themselves whenever they wanted and no matter how many roles of film they were placed where they were visible. 


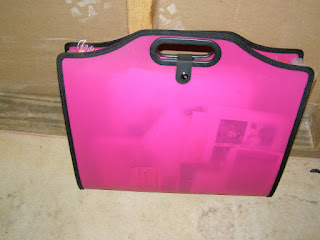
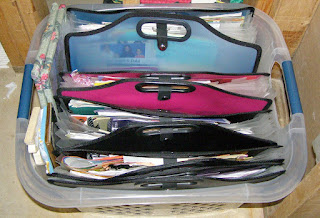
So I separated the photos and memorabilia then I sorted all of the memorabilia into a designated art/school/memorabilia file tote for each child and adult

I then put school photos, sports photos and anything oversized into 3-ring binders and page protectors, this is  a great system that you can move around easily if needed. 
Then I Got Photo Albums at Michaels craft storehttp://michaels.com/art/online/home that were 40% off at the time


They display 5~ 4x6 photos on each page
I then cut up sheets of beautiful patterned papers that are glitterized and foiled for my daughters scrapbook pages, they come in tablet form in 12x12 sheets and I cut them down to 8 1/2 x 11 size for the page protectors also at Michaels. The binders I've used you can customize with papers on the cover and a strip on the side and another sheet for the back. I did this for future scrapbooking and they have in tablet form the same type papers in 4x6 size, just rip one off and stick photo to it then to scrapbook page. Easy!!
Heres some of the pretty papers also found at Michaels craft store or Joanns www.joanns.com
How beautiful are these?
Heres a pic of all of them together
Another
Now a boys version
Well if you have any questions or comments, feel free to leave them here. Thanks for looking and I hope that I have helped some of you out. 'Ciao PS My kids love to look at themselves now and not lost in the shuffle.


Related Posts Plugin for WordPress, Blogger...